You’ve probably shared your Wi-Fi password dozens of times without thinking twice. A friend visits for dinner, a relative stays the weekend, a technician asks to connect while fixing your boiler — and you rattle off the password like it’s nothing.
But here’s the thing: when you share your main Wi-Fi password, you’re not just giving someone internet access. You’re giving them a front-row seat to every device on your home network — your smart cameras, your NAS drive, your printer, your work laptop, your kids’ tablets. Everything.
The solution isn’t to stop being hospitable. It’s to set up a guest Wi-Fi network — and then make sure it’s actually doing its job.
What Happens When You Share Your Main Wi-Fi
Most people don’t realize what’s at stake because the risk is invisible. But here’s why you should never share your main Wi-Fi password casually.
Anyone on your network can see your devices. When a device connects to your main Wi-Fi, it joins the same local network as everything else. That means it can potentially discover — and in some cases interact with — your personal devices. Shared folders, smart home dashboards, network-attached storage: all of it becomes visible.
IoT devices are easy targets. Smart home gadgets are notoriously insecure. Many have weak or no authentication, default passwords, and unpatched firmware. A compromised or infected guest device on the same network can reach these IoT endpoints directly.
Malware spreads laterally. If a guest’s phone or laptop carries malware, being on your main network gives that malware a direct path to your other devices. This is how threats move laterally — from one machine to another, silently. (For a deeper look at what can go wrong, see our article The Biggest Cyber Threats Hiding in Your Home Network)
Beyond the security risks, there are practical concerns too. A guest streaming 4K or torrenting files can choke your bandwidth — a real problem if you work from home. And in some jurisdictions, if a guest does something illegal on your connection, the activity traces back to your IP address.
Guest Network vs Main Network: What’s the Difference?
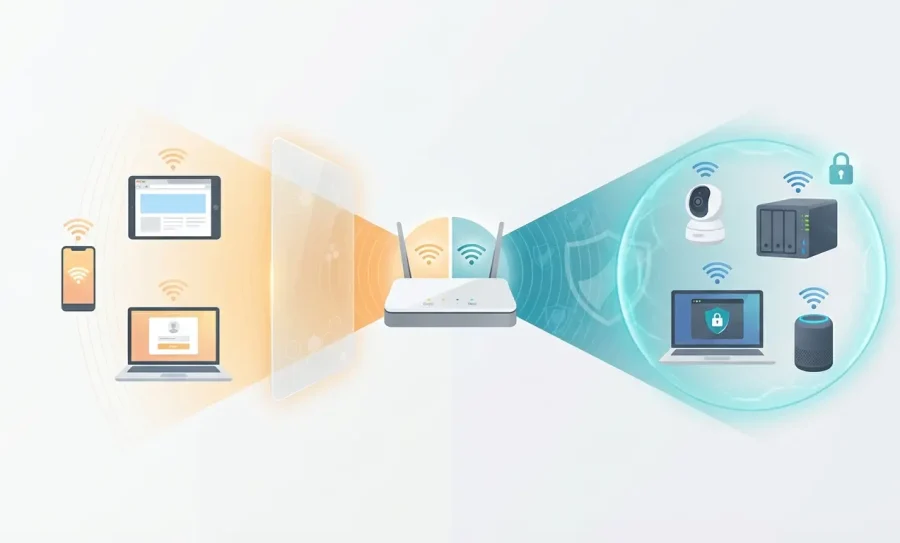
A guest Wi-Fi network is a separate SSID (network name) broadcast by your router. It provides internet access but — when configured correctly — isolates guest devices from your main network. Devices on the guest side cannot see, access, or interact with devices on the main side.
Think of it like this: giving someone your main Wi-Fi password is like inviting them into your entire house and leaving every door unlocked. A guest network is like giving visitors a separate entrance that leads only to the living room — they get what they need, but your private rooms stay locked.
Most modern routers — including those provided by ISPs — support guest networks natively. It’s usually a single setting buried in the admin panel, waiting to be switched on.
How to Set Up Guest Wi-Fi (Step by Step)
Setting up a secure guest network takes about ten minutes. Here’s a router-agnostic walkthrough that applies to most brands.
Step 1 — Log in to your router’s admin panel
Open a browser and type your router’s IP address (usually 192.168.1.1 or 192.168.0.1). Enter your admin username and password. If you’ve never changed these, check the label on the back of your router.
💡 Tip: Not sure what router you have or how to access it? Use Fing Desktop — it’s free to download — to identify your router’s brand, model, and IP address in seconds.
Step 2 — Find the Guest Network setting
Look under Wireless Settings, Wi-Fi Settings, or a dedicated Guest Network tab. The exact location varies by manufacturer, but nearly every modern router has this option.
Step 3 — Enable the guest network and set a strong password
Give your guest SSID a distinct name (e.g., Home_Guest) and set a strong, unique password — never reuse your main Wi-Fi password. Use WPA2 or WPA3 encryption if available.
Step 4 — Enable network isolation
This is the most important step. Look for a setting called AP Isolation, Client Isolation, or Network Isolation and make sure it’s turned on. This is what prevents guest devices from seeing anything on your main network.
Step 5 — Set optional limits
Many routers let you apply bandwidth limits to the guest network and set an auto-expiry timer that disables it after a set period. Both are worth enabling if available.
Step 6 — Test it
Connect a phone or laptop to the guest network. Can you browse the internet? Good. Can you see any devices on your main network? You shouldn’t be able to. If you can, isolation isn’t working properly — and you need to verify it (more on that below).
Is Guest Wi-Fi Safe? Why It’s Not Enough on Its Own
Here’s where most guides stop. They tell you to set up a guest network and call it a day. But the reality is more nuanced.
A guest network is a strong first layer of defense, but there are real guest Wi-Fi security risks that remain even after setup:
- You can’t verify isolation without a tool. Just because you enabled the setting doesn’t mean it’s working correctly. Some routers have buggy implementations, especially cheaper ISP-provided models.
- You have no visibility into who’s connected. Once the password is shared, anyone who has it can connect at any time — long after the party is over.
- Devices linger. Phones auto-reconnect to remembered networks. That guest who visited three months ago? Their phone may still be hopping onto your guest network every time they walk past your house.
- You’re blind between scans. Even if you occasionally check your router’s admin panel, you’re only seeing a snapshot. What about the device that connects at 3 AM?
This is where most home users hit a wall. The guest network is set up, but there’s no way to monitor guest network for unknown devices on an ongoing basis — unless you add the right tool.
How to Check Who Is Connected to Your Guest Wi-Fi
Once your guest network is up and running, you need a way to actually see what’s happening on it. Fing gives you two levels of visibility so you can choose the level of control that fits your needs.
Fing Desktop — Free, Instant Visibility
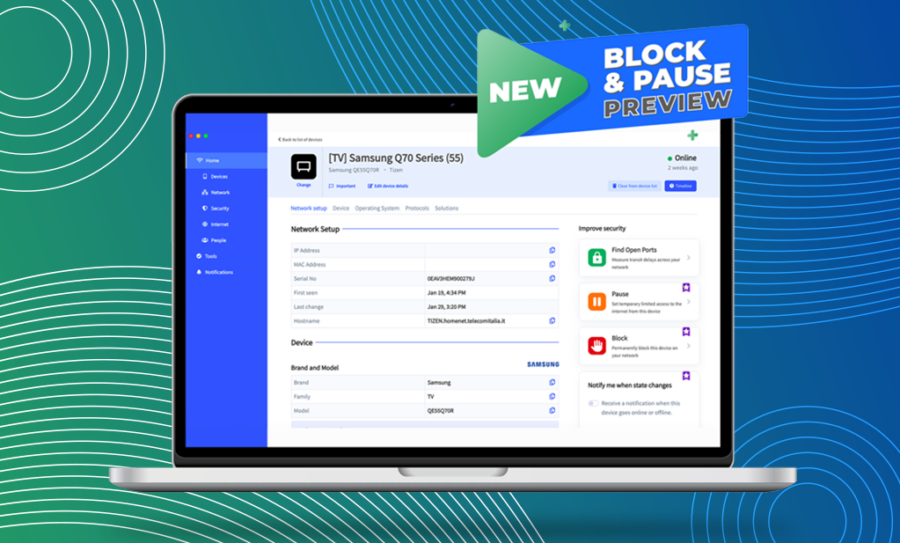
Fing Desktop is free to download and allows you to run a full network scan. It gives you something your router’s admin panel rarely can: a clear, detailed picture of every device connected to a given network, identified by brand, model, and device type.
Here’s what it lets you do:
- Run a one-click scan to reveal every connected device on the network you’re monitoring
- Identify unknown devices — Fing doesn’t just show MAC addresses; it tells you whether that mystery entry is a Samsung phone, a Ring doorbell, or something that shouldn’t be there
- Verify that AP isolation is actually working — connect to your guest Wi-Fi, run a Fing Desktop scan, and confirm that your main-network devices are invisible. If they’re not, your isolation configuration needs fixing
- Perform periodic security audits — run a scan before and after gatherings to see exactly what’s changed
Fing Desktop turns the setup steps above from trust-and-hope into verify-and-know. It’s the practical companion to every guest Wi-Fi configuration.
⚠️ Important: Each Fing Desktop instance monitors one network at a time. If you’re scanning your main network, you won’t see devices on your guest network — and vice versa. To audit both, run separate scans while connected to each network individually.
Fing Agent — 24/7 Monitoring for Maximum Security
A scan shows you what’s happening right now. But what about the rest of the day? What about the device that connects while you’re asleep, or the phone that lingers on your guest network weeks after a visitor leaves?
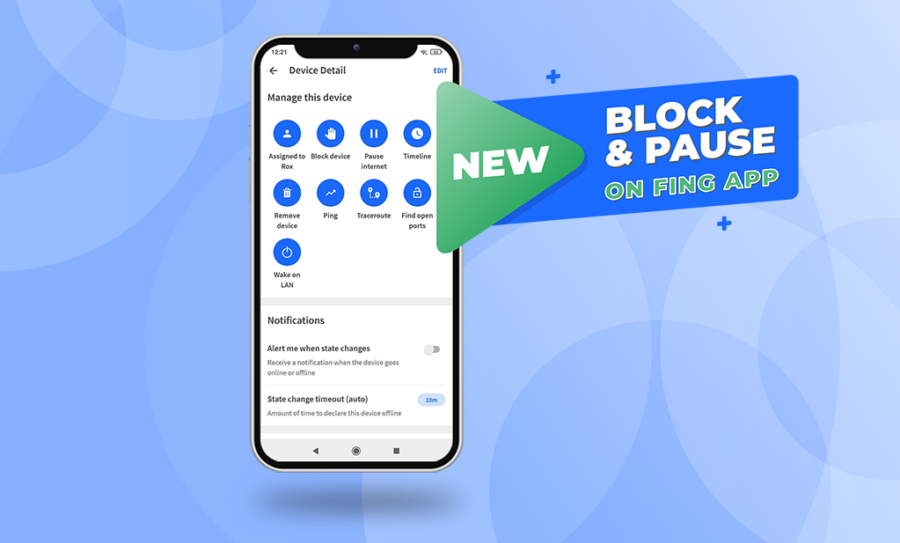
Fing Agent is a 24/7 network monitoring unit available with a paid subscription, designed for anyone who wants continuous, always-on protection:
- Round-the-clock monitoring — Fing Agent watches your network at all times, even when your computer is off
- Instant alerts — get notified the moment a new or unknown device joins the network being monitored
- Historical connection log — see who was connected, when they joined, and when they left. Full audit trail
- Persistent device tracking — catch devices that auto-reconnect days or weeks after the original visit
If setting up a guest network is locking the door, Fing Agent is the security camera watching it 24/7.
⚠️ Important: Like Fing Desktop, each Fing Agent monitors a single network. If you want 24/7 coverage on both your main and guest networks, you’ll need a separate Fing Agent for each. This also applies to any additional subnetworks or VLANs in your home setup.
Best Practices for Managing Your Guest Network
Once your guest Wi-Fi is set up and monitored, keep it airtight with these habits:
- Change the guest password regularly — rotate it after every gathering or at least monthly
- Disable the guest network when not in use — if no one’s visiting, turn it off entirely
- Never connect your own IoT devices to the guest network — your smart home devices belong on your main (or a dedicated IoT) network where you control the security
- Name your guest SSID neutrally — don’t broadcast your family name or address (e.g., use Guest_Network instead of TheJohnsons_Guest)
Take Control of Your Network Today
Setting up a guest Wi-Fi network is one of the simplest and most effective things you can do to protect your home network from guest Wi-Fi security risks. It takes ten minutes, costs nothing, and keeps your personal devices shielded from every phone, tablet, and laptop that passes through your front door.
But a guest network you can’t monitor is a guest network you can’t trust.
Start free: Download Fing Desktop and run your first network scan — see every device, verify your isolation, and take back control. It’s completely free.
Go further: Upgrade to Fing Agent for 24/7 monitoring, instant alerts, and a full historical log of every device that touches your network.
The next time someone asks for your Wi-Fi password, you’ll be ready.